Posts

Showing posts with the label birthday

Card For Jayne

Image
Good morning everyone!  It's a dull rainy day here, but we are desperate for the rain, so I am not going to complain.  My horse needs grass! Anyway, I have a special card to share with you today.  Check this out: This is the front of what looks like a fairly simple card.  The dsp is Everyday Enchantment, with a large piece of Pool Party cardstock cut using my framelits dies and then run through the Bigshot with the square lattice embossing folder. (I still have lots of this dsp left, which is why I'm so pleased Pool Party is staying with us.) The stamp is Summer Silhouettes in Lucky Limeade and Calypso Coral with Happy Birthday stamped with my new stamp set, but it's very similar to the one in the retired Elementary Elegance set. I didn't realise until the card was finished that the dots on the flower really reflect the dots in the dsp. I've popped a little piece of Pool Party ribbon on the side, to add to the softness of the card. But the reall...

A Bit of Bling

Image
As promised, here is the birthday card I've sent to my aunt.  This was one of the last cards I made at craft class before we moved. Sorry to say the photograph doesn't do enough justice to the image, which is beautifully shiny, without being too much.  The stencil is Sweet Poppy by The Craft Station Ltd.  I am pleased with it because we used Dreamweaver paste.  The last time I used it, well over a year ago, I was absolutely hopeless with it and made a real mess.  I do think there is a skill in spreading the paste on properly.  We took the stencil off and added Glamour Dust, one of my favourite things (considering I don't really do glitter).  The lattice down the left hand side was cut with a die which I think is from We R Memory Keepers (hoping Jo will correct me if I'm wrong!) and is very delicate.  I actually used spray adhesive to mount it.  The St Luke's Charity Card Challenge wants to see cards with bling, so I'm happily enterin...

Simply Cards

Image
Hello everyone, I hope you're managing to keep warm.  Most of our snow has melted, but it froze over night and now it's lethal out there.  Good excuse to stay indoors, if you ask me! I subscribe to Simply Cards and Papercraft magazine, and it's very good (very shabby chic oriented).  There was a wonderful set of free stamps and paper in this month's issue, so I decided to get busy.  Here's what I've made: The base is actually Chocolate Chip (SU) but the papers are all from HOTP.  This isn't my style of card making any more, as it's just basically cutting and sticking, but I was really pleased with how these turned out. I have stamped the birds nest, though, also in CC.   The stamps are lovely, I'll definitely be using them again. Here's another one: The bird house image is part of the stamp set and is very sweet.  I've made a list of birthdays from now until the end of April and have 13 to make so these will come in very handy.  I ...

A Teeny Wish

Image
Good afternoon everyone!  We have a few roof tiles missing after the storms this weekend and a small but significant hole in the roof!  Hopefully a man is coming out tomorrow to fix it for us, before we get too much more rain.  Never a dull moment round here. Poor hubby has only just gone back to work today after being off ill since Wednesday afternoon.  How do you tell someone you love them very much, but they're interrupting your crafting time?! Anyway, I managed to get this card made: The green on here is all SU! Wild Wasabi, a colour I wasn't very attracted to at first (considering I like greens generally) but the more I've used it, the more I like it.  The dsp is from the Holly Berry Bouquet range, which I really love.  It's meant to be a Christmas paper, but as you can see, this is very suited to other cards, too. The sentiment on the tag says, 'A teeny little birthday wish,' and continues inside the card with, 'sent with big hugs to a special per...

Vintage Vogue

Image
I just want to share this lovely card with you today, so I can make a note of what we used.  And please don't think I mean it's a lovely card because I made it , as this is one that we made at craft group just before Christmas, so the original idea was not mine. We used Bravo Burgundy and Old Olive inks to stamp the beautiful flowers and foliage from the Vintage Vogue (SU!) stamp set.  We ran the white section through a cuttlebug with a polka dot embossing folder, added the striped dsp and then made the topper, as you can see, with the pretty white flower in the centre of the biggest stamped image.  I made mine slightly lower down than it should have been, so didn't add the sentiment provided, as it was a bit too big, so I added the 'Just For You' when I got home, using my Stamp-a-ma-jig for accuracy, which meant I didn't have to worry that I might get it in the wrong place. I've had a very strange crafting week, where everything I pick up I seem to drop,...

Subconscious Crafting!

Image
I feel I've come full circle as I make my first birthday card of the year, which is always for my friend's son.  He will be 9 on Sunday.  For the past few months, he, his dad and his brother have taken up Ju Jitsu.  I've known for a while the exact image I wanted to use for his card.  Check this out: Of course, it's Teddy Bo doing his karate!  How perfect is this?  It's a digital image, so I adjusted the size to meet my needs and printed it off onto my beautiful smooth paper. I decided to give him a red belt (I actually had to research this!) so coloured his hat to match.  I've backed it with Real Red cardstock.  The tartan paper is from a nice masculine set of checks from Papercellar.  I've added some card candi bottom left in the same red as I coloured Teddy Bo's belt, grey and black.  The sentiment (Time to have fun) is by LOTV.  I cut the mount for it from a red scalloped die, then decided it was too big, so cut the sca...

Christmas Carol!

Image
Hello all!  I hope you're having a good weekend.  We are just enjoying the calm after the storm.  We had 90mph winds here.  I've never known anything like it. Today I want to show you a card I made for a lovely lady called Carol who goes to our craft group.  Her birthday is on Christmas Day.  It took me ages to realise that that's probably why she's called Carol (I am clearly not the brains of the outfit!) Anyway, here's the card: This card uses all Marina Mist, which is one of my favourite SU colours.  I've used my new Marianne die, to make  the doily shape.  I've recently bought some sponge daubers, which are much cheaper than buying the inkssential sticks and used one of those to sponge around the edge of the doily.  I stamped one of my Four Frames stamps to put on top of it, stamped the image from my Clearly For You set and punched it out.  Lovely.  Now, I know if you've been using Stampin Up stuff for a...

Card For Jake

Image
Hi there!  I've had a strange week where I've not been very well at all.  You know you have those times where you make something when you're ill and look at it later and wonder, 'What was I thinking?!'  BUT having said that, I have made a card for my middle grandson's birthday later this month. The papers are by October Afternoon.  The giraffe is something I've had in my stash since I very first started cardmaking.  The length of him suits this card perfectly.   The wording and the FIVE are stamped with Marina Mist ink, but the true significance of this card, is that it's a gift card, look: This is made from a piece of double-sided paper 12"x6".  Score it at 3", 6" & 9" and fold along the score lines.  Make sure the middle one points towards you.  Lay it down and cut along the centre score line, but not right to the ends.  Stick down the three sides and cut out a semi-circle with a circle punch.  Your gift card fit...

Love That Card

Image
I've been very busy making cards, alternating between Christmas cards and cards for other occasions.  This is a card I've made for a friend: I saw the instructions for making this card in Cardmaking and Papercraft magazine over a year ago.  I was very drawn to it and have kept it all this time.  It's only now I've got everything I need to make it.  I've embossed a piece of white card, then used a pink Memento ink pad on it.  The card is purple plum from Stampin Up.  As you can see, I've torn it at an angle along the bottom and curled it up.  I've coloured what was white organza ribbon with an aubergine promarker and stamped the flourish and flower at the bottom of the card.  I've put a gem on either end to add a little bling.  I've stamped an LOTV circular sentiment and backed it with a scalloped circle in the same purple plum card. This card was really fun to make, there was so much to do, but I really enjoyed it. I love these col...

Card For Pam

Image
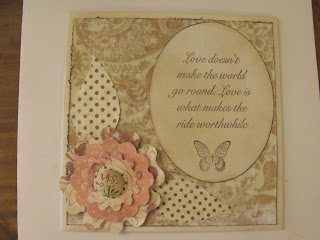
As you may know, if you're a regular follower, I made a commitment at the beginning of the year to make a birthday card for everyone in our Bible Study group so that everyone could sign it.  October has been a busy month, as it turns out, with three birthdays.  This is what I made for one lovely person: For ages I've been wanting to make a card where I had a flower in the bottom corner, with a leaf going horizontally and vertically, but for some reason it's taken me ages to work out what to use.  This time it was MME that came to the rescue, with my lovely Wild Asparagus papers, and this gorgeous die cut flower.  I just stacked one on top of the other, and finished off with a fabric brad from the same range. I cut a square of paper, 15x15cm, distressed the edges and added some brown ink.  I cut an oval of white cardstock and distressed it all over before stamping the sentiment and the butterfly, both in Memento brown ink.  The stamps are from the Flouris...

Time For Cake

Image
I am a big fan of all things involving cake, so card making is no exception.  I decided it was time to pull out one of my favourite stamps for the card I made yesterday: Apologies for the photo quality as I'd put this card in a bag before realising I hadn't photographed it.  I can't take it out again without ruining the label on the back, so I had to take a picture in situ.  I had a bit of a saga with this card, as the paper I really wanted to use is by Papertrey Ink.  The whole paper pack only cost $8.  That would have been fine, but the delivery charge was $37!  That's a bit of a no-no, isn't it?  Even for me!  I really don't understand why shipping is so expensive, or why they don't get a distributor in the UK, as their papers and stamps would be very popular here.  Hey-ho!  So I started searching for another paper, and I'm delighted to say I found this paper from October Afternoon.  They never let me down, do they?...

Micing On The Cake

Image
I haven't used this stamp for ages, but think it's very sweet.  I wanted to make one last card for the church sale, and here it is: I am aware that when you use an embossing folder, the card that is embossed is a certain size but I wanted to make a 6"x6" card.  You can see the card is embossed on the left but it doesn't reach all the way over to the right.  I put the torn piece of patterened paper across the bottom which hides most of it, but the blank bit at the top was an excellent place for some card candy.  Of course I coloured the image with my Promarkers on the most wonderful card which I buy at Little Claire's Designs.  It's truly beautiful stuff for stamping and colouring, the pens glide across the top of it.  I've attached some ribbon on the left side and there we are. So now it's Christmas cards all the way, especially as I've just got my latest Cardmaking Making and Papercraft magazine and the papers and chipboards in there are st...

Have Your Cake...

Image
I've spent the morning making a card for Sketch Saturday Challenge.  I've been so busy I haven't had a chance to do a challenge for a couple of weeks.  The stamp I've used is from Quick Cards magazine.  I've been looking for a stamp with a cake stand on it for ages, so jumped at this one.  The papers are all from the Tea House set by Dovecraft.  They're so pretty, most have something to do with tea and cake.  I've used some pretty pink ric rac at the top and bottom and added a sentiment from LOTV.  All the images and papers are backed onto pearlescent pink card, which is lovely too. Thanks for dropping by today, I'm off outside to enjoy the sunshine. Blessings everyone! Jane xx

Prima Papers

Image
Do you ever have a situation where you buy some papers for a particular project, then don't know what to do with the rest of the pad?  I've done this recently because I've bought some Prima Papers called 'Melody' which I used one sheet of for the ruby wedding anniversary cards I made a little while back.  The papers are all works of art, but I haven't had a clue what to do with them.  Then on Wednesday I was thumbing through one of my old magazines and admiring some cards in there.  After a few minutes I twigged that the papers in the article were the very same ones I own. So I leapt to my desk and made this: I used my white jelly-roll pen to do all the stitching by hand.  It's the first time I've had the nerve to do it and I'm really pleased with the result.  Not a stamp in sight, I'm afraid, which is unusual for me.  I'm inspired now, and hope I can do these papers justice with future creations. Now, before I go, a quick question for yo...

Look What Mama Made!

Image
Goodness, what a busy weekend it's been!  I've hardly sat down.  So this is what I made on Friday: The tag is from a set bought from Inkylicious, and I've used their stamp for the 'Post Card' stamp down the left hand side, and the post mark at the top, but the flower is from Penny Black.  I've coloured it with water colour pencils, very nervously as I'd used Tim Holtz distress ink over the entire tag first, but it was fine.  Here is the whole card: It's got a beautiful feel to it because of the distress ink.  I tied each tag with gardening twine before sticking them down.  You can do this on a sheet of A4 card.  The tags are 8cm wide, so I cut A4 down to 27cm wide and scored it into 9cm sections so a bit of the black border would show.  The mid section has been stamped with my Letter stamp from Penny Black.  I am getting into mixing and matching stamps from different sets.  As long as the scale is the same, it seems to work reall...

Craft Class

Image
Hello there all, I hope you're getting some of the sunshine we're having, it's been a funny summer so far, hasn't it?  On Tuesday night I went to my craft class at Dolly Cottage Crafts.  I haven't been for absolute ages and really enjoyed myself.  Yes, we make cards, but we have such a laugh at the same time.  It was amazing for me to see how far I've come since I last went (I'm not afraid of the Bigshot, for a start!) We made a Christmas card, which I'll show you nearer the festive season, but I also made this: It looks quite effective, but it's very easy to do.  It's all about using double sided paper.  This is Bloom and Grow by MME.  I have a soft spot for this paper as it's the first paper I came across when I started crafting and had that moment of revelation of 'It's not just me!  Other people like paper, too!'  I never bought it, though, so it was lovely to have the opportunity to use some.  The variations of this card ...

The St Luke's Charity Card Challenge

Image
I've finally got around to making my card for the St Luke's Hospice Challenge this month, which is titled, 'Black, White and One Other Colour', so this is what I've made: Every so often I get lucky with peel-offs and have a good idea of what to do with them, but not very often!   I've put the bird peel-off onto glitter card, which is very shiny, even though it's hard to tell from the photograph.  I've embossed a bigger piece of card, which I'm glad you can see in the photo, and added it to my white card base.  I've taken the peel-off leaves and put it across the middle, then added my image with sticky fixers underneath.  After a lot of faffing about, I stamped and heat embossed the wording, 'A little bird told me...' which continues inside the card with '... it's your birthday,' and just backed it on a piece of black card.  I really enjoyed making this, it was one of those 'make it up as you go along' cards, but I...

Some Bunny Loves You

Image
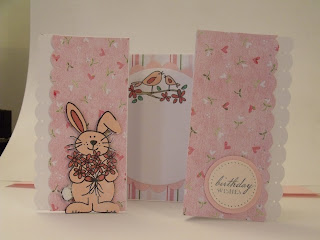
I've no idea if there is a special name for this type of fold for a card, but I really had fun making it.  It's two card blanks stuck together, with the front flaps of both folded backwards.  As you can see, I've used an EK Success border punch along both outside edges.  The rabbit stamp is from Little Claire's, which I coloured in pastel pink and antique pink Promarkers.  I've put some white fluffy stuff on her tail. I hope you can see the inside, which has stripy Nitwits paper on it, and a scalloped circle to write the message in, but my favourite part is the little bird stamp at the top.  I've used a little Craftwork Cards sentiment on the right hand side. I made a similar one here: This is with Nitwits paper again, and the little mummy duck from Little Claire's.  This was the first day I got my new sentiments from LOTV and couldn't wait to use them. Here is the inside: I've used toning paper from the same range, and done a yellow scalloped c...

Happy Birthday Darling!

Image
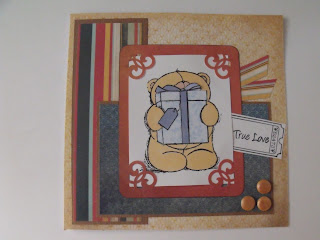
I've decided to use the fab sketch over at Sunday Sketch and Stamp  to make my husband's birthday card.  This is only the second time I've made his birthday card, and I find it quite hard work as I want to make something he will really like. And so, here we are: I often end up using a Forever Friends bear as I think they're so sweet.  I colour them with Blush and Pale Yellow Promarkers.  I'm not saying that's the only way to do it, but I like the end result each time I do it. I stamped the image again on patterened blue paper and cut the gift box out of it, then stamped it again on plain card, cut out the ribbon and tag and coloured them with a blue Promarker, then stuck them on. I have finally got around to using these truly awesome Kaisercraft Seaside collection papers.  In fact they're so awesome I've spent many hours just gazing at them and wondering what on earth I could do with them to do them justice  (and, I confess, stroking them, but ...

In The Moonlight

Image
Some of you will know that I get to sell some of my cards.  They are at a set price, and as I like to give value for money to my customers, I make them all 6"x6" (more or less) and they have quite a lot on them.  The trouble is, I have lots of smaller card blanks that I need to use up.  Some of them are cream and they're only 12.5cm square, and I don't feel I can charge a lot for them as they're fairly small.  So I've decided to use them for the church sale, then I can charge less for them. And so, having experimented with my inks the other day, I came up with this.  I don't have many inks (No Tim Holtz yet - sob!) so had to play about quite a bit, and be a lot firmer than I'd expected, in order to achieve this effect.  I cut a circle of card out and held it in the middle while I sponged the lilac all over the rest of the card.  Then I removed the circle and stamped the owl image from Little Claire's Designs in the space.  I used a...