Posts

Showing posts from 2012

Merry Christmas, Everyone!

Image
Hello all, sorry I haven't been around much, this has been the most hectic build-up to Christmas ever!  I've had two lots of course work to submit as well as actually being at work, Christmas shopping, seeing to Barnaby etc, which now takes twice as long as I have to muck out as well as riding him. I've also had four birthdays in December, but I've managed to get out of three of them by using cards from my stash.  I did make one, though, so I'll pop back soon and show you. But for now, this is my Christmas card to all of you: This is another card inspired by Ruth M , although I think I actually came across it on Pinterest (the new love of my life!)  I still find the Pennant Parade punch thrilling to work with and when I saw this idea of a 3D tree I couldn't wait to have a go.  The small scale of the holly on the dsp is perfect for this design. I managed to get a hand-made card done for every member of staff at work, but had to buy them for  the residents...

French Foliage

Image
Oh my, I am head over heels in love with a new stamp set.  I made this card last week for a resident: This French Foliage stamp set has got to be one of the most versatile I've ever come across.  There is no limit to what you can do with it. The base card is more mustard. The next layer is very vanilla. I've stamped the script stamp in crumb cake on it, then the leaf in more mustard with early espresso rolled round the edges before stamping, which creates a fabulous effect.  I've made the tag and stamped a small section of very vanilla cardstock again.  I've used the little 'Paris' stamp on this piece and the ink blotch stamp in more mustard.  Every time I stamped something I gasped at how fab it was as it appeared on the paper.  I bet everyone who has this stamp set feels the same way about it.  It's by far the most 'artistic' set I've ever used. The tag has a button and twine at the top and a little butterfly on the sentiment o...

Playing With Pines and Poinsettias

Image
I have spent many hours trawling the internet trying to find ways that people have used the Pines and Poinsettias stamp set from last year as I've borrowed it from a friend.  I also bought the Holly Berry Bouquet dsp, so that I could use both items together.  I had quite an adventure in the end, come and have a look: For the first card I drew a circle around one of my little SU brads containers and stamped the image all the way around, then rubbed the pencil line out.  I deliberately did it on white cardstock and the card is very clean and fresh looking.  The real red card base is 4" square.  I've stamped the sentiment, cut it out and propped it up on dimensionals.  The word 'merry' is from the Pennant Parade set.  Although Pines and Poinsettias is retired, there's probably something in the new catalogue that would work in a similar way. Then I saw a video on Youtube here where a girl makes some lovely tags.  I decided to have a go and the...

Card For Sadie

Image
I've had to make two cards for residents very close together, so, with a need for speed I turned to Pinterest for inspiration.  I decided to case a card by Judy May, which you can see here  .  I love to case cards because I like starting out with a lot of the same stuff on the original card, then getting to the bit where you don't have something they used, so you have to use your imagination to think of something to use that captures the spirit of that card, the bit that impressed you, and then the card becomes your version.  Here's what I made: Somewhere between Real Red and Cherry Cobbler lies Riding Hood Red, and this is the first time I've used this lovely colour, and the papers from the Twitterpated dsp that work with it.  The base card is the beautiful Baja Breeze.  I wanted to capture the oval shape in the centre from the original card, but don't have those particular embossing folders - yet!  (Don't worry, they are on my shopping list!)...

Dynamic Duos No 27

Image
I've decided to play along with this week's Dynamic Duos , as I've been dying to have a play with my new In-Colour cardstock.  There is no getting away from the fact that these are 'in your face' colours.  I realised I was slightly limited as I don't have the pens yet, just the inks and cardstock, but that was good as it made me really think.  I decided not to shy away from this being a bold colour combo, but to go with it, so this is the card I made: You'll no doubt have seen the Sprinkled Expressions stamp set that I've used here.  I've stamped it in the Raspberry Ripple ink.  The new ink pads are lovely, by the way, very juicy!  I've used the framelits die to cut into the Gumball Green, which I embossed with the square lattice embossing folder.  This is definitely my new go to toy tool (!) and will be on loads of cards from now on.  I don't know why I took so long to get round to buying it really. I've  cut a leaf with my Mari...

Hey Baby!

Image
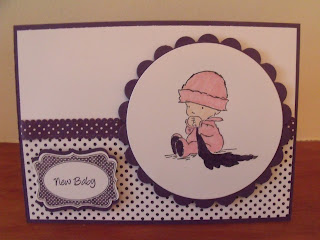
The girl on our yard finally gave birth to a 9lb baby girl (good grief!) so I was poised to make a card.  Then it actually took two days to make.  When you see it, you'll wonder why, so I'd better explain...  I decided to use lots of pink, put it all in place, with the baby image on top and didn't like it at all.  It was just too, well, pink!  I'd decided to base it on the ribbon I was going to use, and this beautiful ribbon kept falling out of my box (shouting, "Pick me!  Pick me!") and suddenly everything came together: It turns out the colour is Elegant Eggplant and I've hardly ever used it, but it's perfect for this card.  I know you think you're seeing spots before your eyes, but I felt I had a theme going there for a minute!  The cute image is from LOTV but everything else is SU.  I'm thrilled with the dotty bottom part as I used my Dot Dot Dot stamp with my SAMJ and it lined up perfectly.  I suddenly remembered the Four Frames ...

Card For Abby

Image
Oh boy, have I been having fun.  This is the card I made last week for my youngest daughter.  I got a bit carried away... All I knew was that I wanted to make an easel card where the centre piece was this fancy square shape.  The card I'd seen that inspired me looked nothing like this! I started with the Spellbinder die (if you have the Top Note die it will be perfect) and cut some of this beautiful Everyday Enchantment dsp.  It contains Poppy Parade and Soft Suede, so I combined them on the butterfly at the top and stamped one of the sentiments from the butterfly set.  Then I went to town a bit on the inside, look: I've used the Fresh Vintage stamp set (retired) and stamped all around the edge.  But of course my favourite bit is the Four Frames stamp at the bottom, with the little birds from the Clearly For You stamp set, how sweet is that?  But I wasn't finished there.  I recently looked on You Tube for a video on how to make a post-it n...

Christmas Is Coming! (And 'Knowing Your Style')

Image
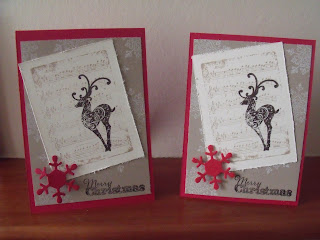
I started off the year making Christmas cards and was doing quite well, but there's no incentive in June and July, is there?  So, let the panic begin! Actually I've decided to make at least 2 cards each time I make something I like, so this is what I made on Tuesday: Again, I seem to have used a cluster of different products, but I really like the end result.  And I do think by the time you've got one the way you like it, you may as well make another one. The base is real red, C6 size.  On top of that is a piece of crumb cake, with white snowflakes on it, from a set that was free with my mag.  On top of that is a piece of very vanilla, with my LOTV music stamp stamped on in crumb cake.  On top of that is this beautiful reindeer in chocolate chip.  I was just playing about with stamping something dark onto something light, and this is what I ended up with. But what I really wanted to  ask today is, "Do you know your stamping style?"...

Welcome Baby!

Image
I have been working on a very special card.  Our youngest daughter Abby and her hubby have finally had a dream come true and been able to foster a beautiful little boy.  They have been longing for this day, so I wanted to celebrate with them.  We went to visit on Sunday and I was able to take this card along with me: I've used lots of different items to make my vision a reality here, and I'm so glad I've got all these items to make this card possible! I started off by stamping the Teddy Bo (free with Simply Cards and Papercraft back in May or June) in Soft Suede ink.  Up until then I'd intended to make the card in red, blue and green, but I fell in love with the colour as soon as it touched the paper, and the rest fell into place after that. The balloons have been stamped in river rock, crumb cake and choc chip and cut out with my balloon dies and propped up on dimensionals after I'd taped some linen thread to the back.  I stamped just Teddy Bo's paw out, ...

Pennant Parade Birthday

Image
My daughter's birthday was at the end of last month, and this is what I made for her: This is my first real go at a card using the Pennant Parade stamp set.  I think it's more that I'm nervous about how the string will work, whether I'll get it in place, etc.  I've been cruising around on Pinterest recently (isn't it awesome?!) and found a card very similar to this by Ruth M.  I saw it and fell in love, instantly, and had to have a go.  The card base is a DL card in pool party.  This is my first go with whisper white cardstock, too, which was lovely to work with.  I dusted over it with bashful blue, which you can't really see in the photo.  Then I had fun stamping the banners in melon mambo, marina mist and lucky limeade.  The sentiment is from the Apothecary Art set, perfect for this card. The little birds are from an old Hero Arts set. The baker's twine was free with a magazine a while ago. I used a tiny flower punch to make the flower...

FM78 Let's Get Twiney

Image
I'm really pleased to be joining in again with the Friday Mashup blog challenge.  This week they want us to use twine and leaves on our creations.  This is so perfect for me right now I can't begin to tell you.  Here's what I made: This card brings together so many things I've been wanting to do for a long time: The first thing is that I've wanted to use a vertical sentiment on a tag, and here it is. It's a beautiful quotation stamp and it's from Clarity Stamps.  Love it.  It's in soft suede ink, by the way. Secondly, I've wanted to use this circular die cut in some way, but have waited for the perfect moment to arrive (thanks Jo Wright!).  The dsp is more from my old favourite, Spice Cake.  The perfect time of year to be using this up. Thirdly, I've recently bought a set of leaf die cuts from Spellbinders.  Now if I'd known SU were going to bring out their fantastic set of die cuts and matching stamps I would have le...

Card For Caelan

Image
Hello, hope you're all well.  I'm going to tell you the sad news, then move swiftly on, but I can't carry on blogging without mentioning it... John's horse Zak was injured last Saturday, with a tendon injury.  It turned out to be very serious indeed so on Wednesday we made the difficult decision to have him put to sleep.  It was totally heartrending and I never want to do it again.  I've been quite depressed over it as it was so sudden and such a shock, as you can imagine.  There is a big hole in my heart without him here. But I have been card-making, and need to do it more than ever now to cheer myself up.  So today, here is the card I made for my grandson's third birthday.  I'm sorry that the photo isn't great quality, I didn't realise until now and I've already posted it: The card is all baja breeze, and I can't remember now where I got the stamp from, but it's so sweet (coloured with Promarkers.)  I paper pieced the parcel from ...

Dynamic Duos No 21

Image
Oh my, two posts in one day, what is going on?!  This is how it began: I keep seeing cards using the triple time stamping technique.  Dawn Olchefske has a fabulous video here .  I plunged in with a card for one of the residents, have a look: The colours here are Early Espresso and Crumb Cake. BUT then I saw this week's Dynamic Duos blog challenge, which is to use Always Artichoke and Certainly Celery.  I was so struck by the cards made by the design team, as I have never used my Always Artichoke card stock.  I instantly knew what I wanted to do, and here it is: The overall card is only 4 1/4" x 5 1/2" but it fits in a C6 envelope.  You can see the technique for yourself on the video, it's very clever.  I have used a flourish background stamp in Certainly Celery, then the flower from the Fresh Vintage stamp set, and stacked the Whisper White cards one on top of the other and stamped away, first the sentiment, then the flourish, then the flo...

Cagey Card

Image
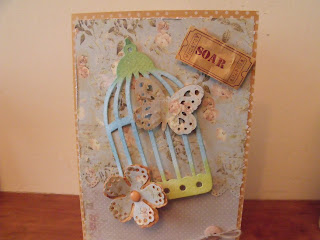
My darling hubby bought me a subscription to Simply Cards and Papercraft magazine as a Christmas present, then not long after that I went off it (daren't tell hubby!) so I've decided I have to make the best of it and see what projects I can make out of it each month.  This is what I've made this time: I've basically cased the card from the magazine, as the original had a fairy on it, which I just couldn't do (interesting technique though it was!) but I liked the colour scheme very much, and the fact that it uses this birdcage die from Tim Holtz, which obviously I have in my possession! Let's start from the bottom and work upwards: Layer 1: 5"x7" more mustard cardstock, stamped around the edge with the Dot Dot Dot background stamp in white ink. Layer 2: Papers from the Prima Botanical paper stack that was free with the magazine.  The edges were distressed.  You can't really see, but the bottom edge of the top paper is cut along with the M...

Mashing It Up

Image
I've been following The Friday Mashup blog for ages and love the challenges they put on, different to your average sketch/colour blog.  I keep seeing starburst cards around and have been dying to have a go, without a clue how to do it, when suddenly, this is this week's Mashup challenge: Make a project with the "Sketch". Or Make a project with the "Starburst technique". Or "Mash it Up" and create a project using the "Sketch and Starburst Technique". I'm not sure if they'd say I've followed the sketch, as my circle is on the other side, but here is my card: I don't seem to have followed the tutorial most people have used, I've followed this brilliant video by Andrea Walford.  The video makes it really clear how to do it, and there's a template to download and cut out. I would say, if you're going to make it, give yourself plenty of time and spend most of it making the decision about what colour sch...

Spice Up Your Life!

Image
I've made a little card, with one of my all-time favourite stamp sets.  Come and have a look: Layer 1: 5"x7" pool party cardstock.  Layer 2: soft suede. Layer 3: a beautiful design from the Spice Cake dsp.  I am going to use every inch of this fabulous paper! Layer 4: I cut a large size piece of card using the Labels Collection Framelits, then stamped my fave image from the Simply Soft set in Wild Wasabi.  As you probably know, it's a 2-stage set, so I inked up the inside in pool party and stamped away.  I will never get tired of doing this! I added a section of paper from another sheet of the dsp, popped lace on, then added a sentiment using my Four Frames stamps and punch. Just a quick post today as I'm off out shopping. Happy crafting, folks! Jane xx

Postcards From The Edge

Image
I am challenging myself to make a scrapbook page once a month, as I am  stacking up photos that I love and not doing anything with them. So without further ado, here's is this month's project: Yes, okay, most people scrapbook their daughter's wedding, or the grandchildren or their exotic holiday, but I, well, I scrapbook my horse.  And if you knew him, you'd know why. I saw this paper, called 'Cambridge' by Bo Bunny, back in 2011 and fell in love with it.  It's taken me all this time to get round to buying it, though, so I'm really glad it was still in stock. I go through a strange process every time I do a layout.  I sit there and get loads of stuff out that either matches or I think fits my theme.  Then I sit and stare at it for two hours (I kid you not!) Then I go to bed and dream about it all night. Then I get up and spend another 2-3 hours putting my dreams on paper (and finding that half of them don't work!)  This is why there is...

Twitterpated

Image
I've recently sent two cards off to recipients before I'd taken photographs of them, what a fool!  One of them, in particular, was really nice, so I'm quite cross about it.  I've decided from now on I must take a photo as soon as the card is done and write a blog post for it while all the details are still fresh in my mind.  This is a project I did a little while ago, too.  Firstly, the card: I'm starting to really understand how SU! works for me.  I fall in love with a set of dsp, then I go and buy the plain cardstock that goes with it, some gorgeous stamps (and maybe dies or punches) and away I go and create!  This paper,  is called Twitterpated, and it's one of the most beautiful sets of paper I've ever used.  The blue cardstock is baja breeze, one of my fave colours, and the ribbon (oh the ribbon!) is ready pleated in blushing bride, what a fabulous product that turned out to be!   I've used the Apothecary Art stamp set and ...

Let's Talk Layers

Image
I've recently made another card for one of the residents.  She is 91 tomorrow.  This card caused me some problems.  The first problem is that the recipient is blind.  So my first instinct was to just go and buy a musical card.  Except that this lady is also deaf.  So that's no good. So then I thought: She needs a card that's interesting to touch.  So this is what I made: It's a 6x6" white card base.  The second layer is some Pretty In Pink cardstock, embossed using a flowery embossing folder.  Next is a layer of white textured card.  Then there is the top square which is glossy card.  I've embossed the flower (from Little Claire's Designs) in white (kraft) ink, then added white embossing powder and heated it.  Then I've gone over it with Pretty In Pink ink, straight from the little cube.  I am thrilled that it worked.  I added a little smudge of a darker pink in the centre with a sponge dauber. The shape of th...

Card For Joan

Image
I knew  it was Joan's birthday coming up so I decided to ask her about it.  She said she would be 80, which is fine, but later in the conversation she said she was born in 1922.  Now maths is not my strong point, but I lay in bed that night going over and over it and still coming up with 90!  So I went in the next day and my manager asked if I could make a 90th birthday card for Joan.  Phew, my maths isn't that bad then.  I'm already at the stage where I'm beginning to forget how old I am, so I totally understand! I knew straight away what I wanted to make, and here it is: This is the first time I've cut into this beautiful sheet of 12x12" dsp from the Everyday Enchantment set. Technically the red on the paper is Poppy Parade (goodbye sweet love, sob!) but I stamped the image (from Fresh Vintage)  in Real Red and it looks a complete match.  The 'white' is actually Very Vanilla, which is the background for the dsp, so I've carried that through...

Faith In Nature

Image
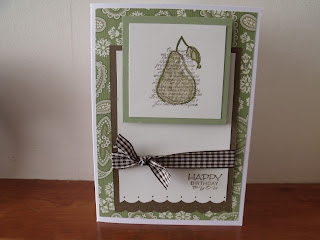
I had a wonderful time making this card that I first saw on Cindy Hall's blog.  I was looking through the Splitcoaststampers galleries to see what people had done with the Faith In Nature set and her card leapt out at me.  Here's my version: I stamped the pear image and coloured it in with crumb cake marker pen, just very roughly.  The dsp is from the Spice Cake range and the card is very vanilla and soft suede.  The ribbon is just a spare piece from my stash, which has nearly all gone now.  The stamp is from a set of Teddy Bo stamps that came free with my magazine a couple of months ago.  It's a very handy size and I'll probably use it a lot.  I love how this came together, but looking at it now, I wish I'd just put the square with the image on lower down, but then it might not all have fitted with the ribbon.  This card is the reason I bought some pear pizzazz cardstock and fell in love with it, but, too late, my friend!  Never mind, ...

Away With The Fairies (Again)

Image
I decided to invest in a new stamped image for my second card for Lynne's other granddaughter.  I spent ages trawling through the LOTV inspirations blog for..., well, inspiration really.  There are some stunning fairy stamps on there.  In the end, this is what I made: I used my new framelits dies to cut a section out of some So Saffron card, which I then embossed with my new, large embossing folder.  I stamped the image on a piece of white card and coloured it with So Saffron, Old Olive and Early Espresso.  Have a closer look: How adorable is she?  Look at her little shoes and her wings.  As I said before, I'm not keen on fairies, but this stamp could change my mind.  The little extras are the punched out butterfly in Old Olive which I've run through my polka dot ef.  I printed the sentiment on the computer and put it at the bottom of the ribbon.  It's not SU ribbon but it's very similar to So Saffron.  Lynne was thrilled...

Card For Ebony

Image
I finally feel as if my mojo has come back.  I made a list yesterday of all the craft things I want to make over the next few weeks and there are 20 things on the list, which means my mojo is in full flow, do you know what I mean? The next thing is, I have to make a rule that I don't craft after 8pm, as it sets my brain alight and I can't go to sleep when I go to bed.  Last night I was up until 12.30 crafting.  That's no good, is it?! Anyway, here is the card that I made for my beautiful granddaughter this August: I was researching for another project and came across a tri-shutter card and decided it would be perfect for the project I had in mind.  There are different styles of shutter card, where the panels are rectangular, but the design I saw had square panels.  It took ages trawling the net for some instructions and dimensions to make one like this. Have a closer look at the stamped image: This image is from LOTV.  I was so thrilled wh...

Card For Brenda

Image
I've been asked to make cards for the residents at work for all the staff to sign as various birthdays come up.  I'm a bit sad as I've missed an opportunity to make a card for a lady of 103!  I mean, how often are you going to be asked to do that?!  Unfortunately it was a bit too short notice, so I couldn't do it, which is a shame. BUT I have recently made a card for a lady who is 90.  Check out what I did: This card was inspired by one made by Vicky Hayes recently.  You all know how talented she is (and if you haven't been to her blog, what on earth are you waiting for, get over there now !) I really had to rummage around for some gold cardstock, as it's not something I often use these days, but I felt that a 90th birthday warranted something special.  I played about with silver as well, but plumped for the gold in the end. The base is a white 5x7" card, but I've used my new 5x7" embossing folder, trimmed it slightly, then stuck it on ...

Away With The Fairies!

Image
A friend of mine has asked me to make 2 cards, one for each of her grandchildren.  She tells me they're into fairies, which is so not my favourite thing!  But this is what I've made for the first one:  I actually really enjoyed making this in the end.  My friend said I could use lace, too, which I missed off in the end, preferring this dotty SU! ribbon instead.  The dsp is by October Afternoon and the green is Old Olive.  Here is a close up of the fairy: There's quite a mix of suppliers contributing to this card.  I've coloured the fairy with SU! markers in various pinks, Old Olive and I've used Promarkers for her skin and wings.  I was tempted to put some glitter on, but it never looks as good as I'd like so I decided not to this time.  I don't think it would fit in with the vintage look of the card.  The stamp, incidentally, was a freebie ages ago, which you may well also own.  They are actually a Christmas set, but...

Card For Michelle

Image
Goodness me, such busy days!  And when I'm not working I'm glued to the Olympics.  I thought I'd better pop in today to show you a card I made recently. I made this for the lovely Michelle, who's blog you can see here .  I've used a white 5x7 card base, followed by a slightly smaller layer of Pool Party card.  The dsp, I'm sure you'll recognise, is from the Everyday Enchantment dsp.  I actually ended up with two packs of this!  I'm still at the stroking stage with it, so it's a wonder I've made a card with it at all!  But my new favourite thing is the new Apothecary Art stamp set used with the framelits labels collection.  There is something so thrilling about stamping and colouring this and then cutting it totally accurately with the die.  It's such an interesting shape to use, too.  I've coloured the image with Pool Party and Calypso Coral pens. I've cut a slightly bigger piece in Pool Party and used a very sweet embossing...

Little Bird

Image
Good morning everyone, I hope you're not too hot!  I am having trouble sleeping in the heat and I'm working nights tonight so I've got to develop a strategy for today to work out when to go back to bed!  Here's another card I made recently: Colours used are Marina Mist and Perfect Plum, which go so well together.  I've used the spotty dsp and the script side.  The brown is Early Espresso. Here's a close up of the image This stamp was free with a magazine.  I've stamped it onto watercolour paper and coloured it with Marina Mist and Perfect Plum pens, washed over with a little bit of water.  It's created a lovely effect. A little white satin ribbon and a tag complete the card.  Great fun to make. I'm so excited about the Olympics, as you probably know, I'm horse mad and can't wait to watch all the horsey stuff, but I think I'll be at work for a lot of it. Have a great weekend everyone, I'm off to make my granddaughter's b...