Posts

Showing posts from 2011

Just For Fun - A Look Back At 2011

Image
I've had such a wonderful year of card making and I've learned so much, I thought I'd share some of my thoughts with you as we look forward to 2012. Let's start with gadgets.  I have two contenders for this award.  The runner-up is this little beauty: I'm really sorry, because I threw the packaging away and can't even think who makes these, but what a brilliant item.  I always struggled with glitter and embossing powder, trying to save it and pour it back into the container but this item is fabulous for getting everything back into the pot. But the winner in this catagory is, without a doubt: my wonderful, clever, Stamp-a-ma-jig.  Who would have thought a simple piece of plastic could change your life?!  If you want to know why, let me explain. It's very simple.  It can help you turn this: into this: Thankyou, Stampin Up! I love it. Okay, second award.  I am presenting this to the pad of paper I have used the most this year.  The ru...

Trendy Trees

Image
Hello dear Blog friends!  I hope you've had a lovely Christmas.  Was Santa good to you?  Did you get crafting stuff?  I am thrilled because I got a set of all the Stampin Up! cardstock, the stamp set called Trendy Trees, and the Funky Forest Wheel.  I spent most of Boxing Day playing with everything, and sorting the cardstock into separate packs.  I found it a bit tricky with the Neutrals set, as some of them are very similar, but I think I've got it right. I made this card as a thankyou to some friends who had a party just before Christmas.  I know I could have been quite adventurous with it, but decided to start off as simply as possible. Even hubby was impressed with the quality of the stamping.  This is the reason I bought my Stamp-a-ma-jig.  I can't tell you how satisfying it is to stamp the branches in green then stamp the trunk in brown, exactly where it needs to be.  You see things like this on other blogs and can't ...

Little Donkey

Image
Hi there!  I've decided to make this my last  post before Christmas, as the chores are mounting up and, frankly, if I don't do them, no one else will!  This is the card I sent to my dear friend Margaret .  I just think the sweet simplicity of it sums up the true meaning of Christmas. (And I hope she liked it!) I'd like to take this opportunity to wish you all the joy of the season, and to thank you so much for all the kind and uplifting comments that you've left me this year - they've meant a great deal.  The friendship of the crafting community in blogland has become very special to me. Watch this space, though, as I will be back some time between Christmas and the New Year, to do a little awards ceremony of my very own.  See you then. Best wishes, everyone! Jane xx

Tree Trimmings

Image
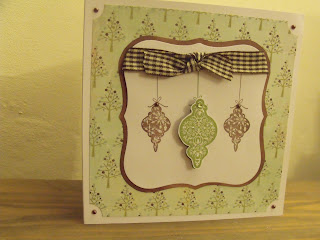
Hello blog friends!  I realise I haven't posted for a few days, but it's been so hectic here.  I can't complain as I've been out for two Christmas lunches and two Christmas parties!  I am sooooo tired! I just wanted to show you the card I made for my craft group friends: The stamps are a brilliant set from Stampin Up! called Tree Trimmings.  You can't see it very well in the photo, but I've stamped each bauble and heat embossed them, just with clear embossing powder to add a bit of shine, but then I've added glitter with my Quickie Glue Pen, so the ornaments sparkle beautifully.  I've added some tiny gems to the top of each bauble (from Wild Orchid Crafts.  Note to self - order some more, they're fabulous!) The background paper is MME Snowed In, and the colours match my inks perfectly.  I was so pleased as it was complete chance.  I stamped the baubles, then started hunting round for paper so was delighted to see how well these went together. I...

Desky Maiden

Image
Hello!  No card to show you today, but I am thrilled to be showing you my new desk.  First of all, here is the old one: This is my beautiful bureau.  We've had a lot of fun together, and her storage capacity is vast.  But when you lift the flap down, the actual work space is quite small.  I am faithful to my furniture, and this desk isn't going anywhere, I'm just going to use her for storage. But this is my new desk: The workspace is much bigger and goes much further back.  I love the drawers on the right.  At the moment they contain all my punches, but this may change.  There's loads of room for my Bigshot on the top. Here are all my shelves, with my Tim Holtz inks, and all the tools I regularly use.  The good thing about the old desk was that I could have everything I needed around me all the time, and this desk had to be the same.  I can't stand having to  jump up and down every five minutes to collect things.  Can...

Frosty The Snowman

Image
When it comes to cardmaking, I'm not really a glitter girl at heart.  I have a lot of glitter card but I haven't ever used it.  Then all of a sudden, this happened! All of last year I wanted a snowflake die, and now I've finally got one, and I'm having a lot of fun with it.  I've also used my new holly leaf punch on here and my Nellie Snellen leaf punch, which cuts out the really delicate leaves you see here.  I stamped the sentiment in the middle in Marina Mist ink and then added the snowman that I'd actually made for a different card but ended up not using it.  I popped him on here and decided he looked right at home. Some of the snowflakes are just plain card, but on others I've added either embossing powder or glamour dust  and it's that contrast that seems to make the card quite pretty.  It's appropriate as we've had snow here this week.  Well I am off to completely rearrange my sitting room, as we have just co...

Rockin' Robin

Image
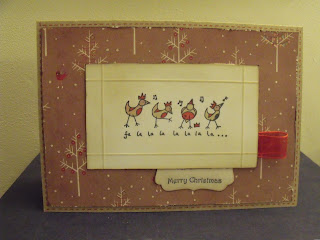
For some reason that I still can't quite understand, this card took me nearly all day to make! This paper is absolutely beautiful.  It's part of the Polar Expressions range by Imaginisce, called Frosted Forest.  It's got very subtle glitter on it, that feels fabulous when you touch it.  But for some reason, I got as far as putting it on the kraft card then my mind went a complete blank and I just couldn't decide what to put with it.  In the end this little robin stamp presented itself to me and it turned out to be the perfect thing.  I've scored the white card to make a little frame, then distressed it and added the stamped image, which matched the card very well once I'd coloured it in.  My horse is called Polar Express, so finding a paper range called Polar Expressions was right up my street.  I have got some left so I dare say I'll manage to think of something else to do with it.  Well, it's just a flying visit today I'm afraid, as I ha...

One Of A Kind

Image
Hello all, I hope it's not too wet and windy where you are.  I'm not keen if I have to be outside, but don't mind snuggling up in front of the fire with a good book, or some cross stitch and a cat on my lap.  I am feeling flushed with success as I'm pretty sure we've done all the Christmas shopping today, so now I have the mammoth task of wrapping everything and making tags! Here's a card I'd like to share with you today: This card is unique because the white and blue dotty paper is my last ever piece of the Craftwork Cards vintage range.  It was perfect for this card.  I've cut the scalloped circle and trapped a die cut snowflake inside vellum and added it to the vertical strip.  The snowflake top left is Perfect Plum and the scalloped circle is Rose Red, two beautiful Stampin Up! colours.  The sentiment is from Craftwork Cards, too.  I was thrilled to be able to die cut a little circle, punch two small holes in it and make my own button.  It...

Take Flight

Image
Hello all, I hope you're well and getting plenty of time to indulge your passion for crafting!  I would like to say a warm welcome to my new followers.  I am thrilled and delighted that you have decided to come along on my journey of discovery into paper crafting with me. Here is my offering for today: I have used a 5x7" card blank.  I've cut sections of glossy card, stamped them with the bird from Special Blessings, and a swirl stamp in Versamark ink and heat embossed them in white embossing powder. Then I've got the brayer out and inked the sections up with Tim Holtz Shabby Shutters ink (but I think it would look nice in Baja Breeze or Marina Mist, too).   I've backed them onto bazzil card.  I'm sorry, I don't know the colour, but it's almost gold.  I added the die cut flower and the buttons, which went really well.  The sentiment, 'Take Flight' is computer generated.  I'm very pleased with the result, and hope my friend likes i...

Card For Priscilla

Image
After a great deal of dithering, I have finally made a card for my BFF.  I'm pretty sure she doesn't read this, which is a good job, as I definitely don't want her to see this before I send it. When I'm making a card that I know will have to be posted, I tend to be a bit cautious, so I love an opportunity to make a card for someone I know I'm going to hand over in person and so can be a bit more lavish.  I'm prepared to go OTT and make a box for it if it doesn't fit in an envelope.  I was surprised to find this easily fits in, though. If you're going to make one of these, you'll need two 6x6" card blanks.  Cut the tops off the outside flaps diagonally and stick the card backs together, one inside the other.  Cover the two triangular sections with your chosen DSP and a border using your favourite border punch, then stick one down on top of the other.  Stamp your image and back it with a scalloped border (square works just as well as round) and s...

LIM Theme - Silhouette

Image
Good afternoon blog friends!  How cheerful am I, considering I have raging toothache?!  I am going to have to phone the dentist as soon as I've done this, which is not something I'm looking forward to.  Maybe I'll linger in blogland a while first! Anyway, I did say yesterday that I had a card to show you that was very quick to make.  As soon as you see it, you'll see why! I was gazing lovingly at the Less Is More challenge this week, which is to use silhouettes, when I realised I had this stamp (from Little Claire Designs) and hadn't even used it yet.  I am so excited to be able to enter a card on my favourite challenge blog! I've used the Labels 1 die from Nestabilities to cut the shape and stamp the image on it, then drew round the die on the red card to make the frame.  I do appreciate the irony of buying a set of dies only to draw round one and cut it out by hand, but it's a really easy shape to cut neatly and well worth the effort.  Although ...

Cards For Men Challenge # 24

Image
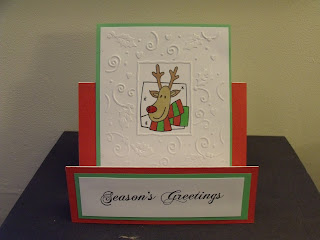
Over on the Cards For Men challenge , they want to see 'Fancy Folds'.  I didn't even know that's what I was doing until I'd finished the card.  I'd been fiddling at my desk for ages and discarded loads of stuff and then got my Rudolph stamps out (from Woodware) and decided to have a play.  This is the result. I think it would make a great card for your brother or uncle etc.  I've been wanting to use this embossing folder for ages, but cut it square instead of leaving it as the usual rectangle.  I am very careful whenever I make a card like this, to make sure it's still going to fit in an envelope. And I'm obviously in recycling mode, as the red card used is actually from some old file dividers that hubby brought me home from work.  You've got to appreciate a husband that goes through his office, sees some card and thinks, 'Hmm, I know where this should go!'  Well it's better than throwing it away, isn't it?! This card was quite ...

Doily Days

Image
I am loving using doilies on my cards.  Here's one I made earlier! The great thing about this card was that I found another way of using my beautiful Prima 'Melody' papers.  As soon as I saw these I felt that they are the sort of papers you want to use in their entirety, i.e. not cut up at all, but I wasn't sure how to do it.  This turns out to be a very good way. The card is 6x6 square.  I've covered the inside with one whole sheet.  It's got a beautiful space in it where you could write your greeting. Then I cut the front of the card in half diagonally, and covered the triangle with another sheet of matching paper, so when the card is closed the front and back line up exactly.  Quite honestly, these papers are so pretty, I could almost have walked away there and not done another thing to them. But no!  I've added a doily that I've stained with Old Paper distress ink and inked it round the edges.  I've cut a scalloped circle from another pape...

Going Dotty

Image
I can't believe how quickly this week's gone by, and have only just realised that I haven't posted on Wednesday like I normally would.  I have been having fun with my Dot Dot Dot stamp.  I am so glad I got the Stamp-a-ma-jig at the same time!  Check this out: Over at the Less is More blog a couple of weeks ago they had a challenge using red and orange.  Loads of people said they didn't like orange.  I was really surprised as I love using orange, as I think this card shows! Do you have an 'oddments' box where you make a topper or something and then decide it's not quite right for your project but keep it anyway as you know you'll find the perfect use for it one day?  I made this little topper a year ago, and just thought it was cute, so I kept it in my box.  I pulled it out when I made this, and realised it was the perfect thing. Then I left it for a whole day as I felt it needed a seniment but couldn't decide where to put it.  I felt I'd ra...

Special Blessings

Image
I'd like you to meet the card I made that made me take the plunge with Stampin Up!: This beautiful dove is from a stamp set called 'Special Blessings.'  As soon as I saw it I knew I had to have it and I bought it in the nick of time before it retired.  It comes with a cross in the same design and some sentiments regarding baptisms and weddings.  The cross would be beautiful for a sympathy card and for Easter. I'd seen this card in a book by Kimber McGray and it's another one of those that took me a month to collect everything together so I could make it. I've run the white cardstock through my Bigshot with a polka dot embossing folder, then stamped the dove and the polka dots on the kraft card.  I didn't think it was very bright so I heat embossed it with white embossing powder and was very pleased with the result.  The ribbon was a bit of a bargain in Derby market, as it was only 19p a metre.  I decided to splash out (the last of the big spenders!)...

Card For Jake

Image
Hi there!  I've had a strange week where I've not been very well at all.  You know you have those times where you make something when you're ill and look at it later and wonder, 'What was I thinking?!'  BUT having said that, I have made a card for my middle grandson's birthday later this month. The papers are by October Afternoon.  The giraffe is something I've had in my stash since I very first started cardmaking.  The length of him suits this card perfectly.   The wording and the FIVE are stamped with Marina Mist ink, but the true significance of this card, is that it's a gift card, look: This is made from a piece of double-sided paper 12"x6".  Score it at 3", 6" & 9" and fold along the score lines.  Make sure the middle one points towards you.  Lay it down and cut along the centre score line, but not right to the ends.  Stick down the three sides and cut out a semi-circle with a circle punch.  Your gift card fit...

Christmas Bear (for two challenges)

Image
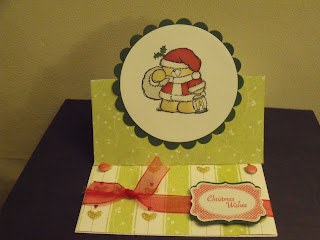
Hi everyone, I hope you've had a good weekend and enjoyed the fireworks on Saturday (here in the UK.)  I am pleased to say, despite the workload, that I've been able to keep on cardmaking, much to my joy. A couple of monthly challenges have popped up that have inspired me, so this card is for: St Luke's Charity Card Challenge      and Ready-Teddy-Go Challenge. If you don't know by now, let me tell you that I have a bit of a thing about bears.  There is always room for one more in my house, and always room for one more in my stamp collection.  I tend to use them a lot on cards for my hubby, whether it's birthday, Christmas or our Anniversary.  I tend to buy a new stamp for these occasions, use it on a design for him first, then 'release' it to be used for other people. This is a Forever Friends bear, which I think I bought from The Glitterpot last Christmas.  Over at St Luke's they want to see a Christmas card, and for Ready-Teddy they w...

Card For Sunday Sketch and Stamp Challenge #79

Image
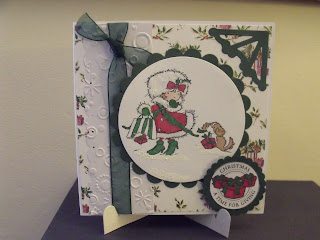
Helloooo! Hope you are all well.  It's been an extremely busy week and will be now throughout the winter as the horses are in at night, which makes a lot more work for me.  I won't be making a card a day like I have through the summer, it'll only be 2 or 3 cards a week now, especially with no craft class either for the next few weeks. BUT I have made a card for this week's Sunday Sketch and Stamp Challenge , which has a lovely sketch for us to use.  Here is my card: You probably all know this image called 'Dropping The Shopping' by LOTV.  I saw it in a magazine last Christmas and absolutely fell in love with it.  The papers are Henbury Lane and the sentiment is by Little Claire's Designs.  I've added glitter to the little girl's hat and coat, and used white embossing powder at their feet, which I find perfect for snow.  I tried some fluffy stuff last year but didn't get on very well with it at all.  Embossing powder really does the trick for m...

Card For Sketch Saturday Challenge

Image
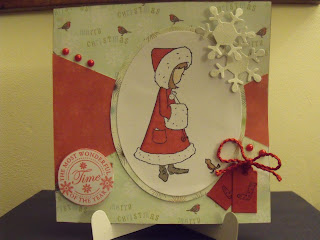
I really liked the sketch over at Sketch Saturday this week, and again I've decided to use it to get a Christmas card done.  Here we are: The sketch is quite unusual and I really had to think about how to do the bit in the middle that's in red.  In the end I cut it out with a little tiny join in the middle which you can't see as it's under the stamped image.  I followed the sketch very closely and instead of getting things ready beforehand I just decided to go with the flow.  Each time I saw an element on the sketch I decided to add something to my card to represent it, hence the snowflakes and the two little tags with stockings stamped on.  I just felt it worked really well that the little girl is looking at a robin and the backing papers have robins on.  My favourite bit was making the snowflakes.  I wiped a Versamark ink pad all over a big section of card, then sprinkled white embossing powder all over it.  I heated the powder until it set, ...

Card for Richard

Image
Hello all, I hope you've had a good weekend, and have had a chance to get into your crafting area or maybe even been to an exhibition.  I would have loved to have been at the Doncaster Dome, but I'm afraid horsey business took precedence this weekend.  I've still been busy though.  This is the latest card I made for one member of our Bible Study group: Everything on here is from Stampin Up! and it was a joy to make.  We tore a piece of scrap paper with a jagged edge, then taped it in place about two-thirds over to the left hand side, covering up the rest of the card blank.  Then we sponged the revealed area with Old Olive ink.  We kept the scrap paper in place while we stamped the leaves in Early Espresso.  I wasn't too sure about these leaves in the catalogue, but they make a striking image when you use them, so these may well go on my shopping list. Next we stamped the tree in Old Olive, but used an Early Espresso pen just to dab ink randomly on t...

Love That Card

Image
I've been very busy making cards, alternating between Christmas cards and cards for other occasions.  This is a card I've made for a friend: I saw the instructions for making this card in Cardmaking and Papercraft magazine over a year ago.  I was very drawn to it and have kept it all this time.  It's only now I've got everything I need to make it.  I've embossed a piece of white card, then used a pink Memento ink pad on it.  The card is purple plum from Stampin Up.  As you can see, I've torn it at an angle along the bottom and curled it up.  I've coloured what was white organza ribbon with an aubergine promarker and stamped the flourish and flower at the bottom of the card.  I've put a gem on either end to add a little bling.  I've stamped an LOTV circular sentiment and backed it with a scalloped circle in the same purple plum card. This card was really fun to make, there was so much to do, but I really enjoyed it. I love these col...

Sympathy 2

Image
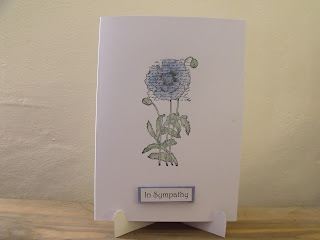
Good morning, everyone!  It's blowing a gale out there and I have several jobs to do outside.  I've decided to fortify myself with a cup of coffee first, so I thought I'd pop a post on while I've got ten minutes. This is the second sympathy card I made for our farriers: As you can see, I decided to keep it very simple.  The stamp is from Penny Black. I always think of poppies for remembrance, but decided not to be conventional and chose blue to colour it.  I've painted it with Aquamarkers, straight onto the card.  Nerve wracking, but surprisingly easy.  I mixed my blue and green to get the green for the leaves.  I'm amazed that it stays so consistent and doesn't show through the card.  The sentiment is computer generated and backed with a border just coloured with Cornflower Blue Promarker. For some reason I'm losing the ability to use sketches to make cards.  I've no idea why this is, except that my style is changing and I'm having ...

Card For Pam

Image
As you may know, if you're a regular follower, I made a commitment at the beginning of the year to make a birthday card for everyone in our Bible Study group so that everyone could sign it.  October has been a busy month, as it turns out, with three birthdays.  This is what I made for one lovely person: For ages I've been wanting to make a card where I had a flower in the bottom corner, with a leaf going horizontally and vertically, but for some reason it's taken me ages to work out what to use.  This time it was MME that came to the rescue, with my lovely Wild Asparagus papers, and this gorgeous die cut flower.  I just stacked one on top of the other, and finished off with a fabric brad from the same range. I cut a square of paper, 15x15cm, distressed the edges and added some brown ink.  I cut an oval of white cardstock and distressed it all over before stamping the sentiment and the butterfly, both in Memento brown ink.  The stamps are from the Flouris...

Santa's Midnight Snack

Image
Hi folks! There's a really good sketch this week at Sketch Saturday , and I'm finding them really useful for helping me with Christmas card layouts, (thankyou girls!) so I've decided to enter this one: I bought this stamp at the very end of my card making last year and fell in love with it, and the ticket sentiment too, as I'd never seen anything like it before in my life.  It's so thrilling to still own them a year on, if you know what I mean, going through my Christmas stash is like greeting old friends.  I was even more delighted to see how well the SU colours Baja Breeze and Cherry Cobbler go together, and these designer papers are a match made in heaven.  Each one of them co-ordinates beautifully, even though they're not SU (hope I don't get into trouble for saying that, as a fact's a fact!)  The piece of Cherry Cobbler card has been embossed with a Christmas snowflake embossing folder.  Here is a close-up of the Santa image: Look at him with h...

Sympathy Card

Image
I was very sad to hear that a young man had died, who is very good friends with our farrier.  Our farrier asked if I could make some sympathy cards for them to give to the family, which is what I've been working on over the weekend.  I have made one or two sympathy cards before, but was very affected as I make these and my heart goes out to the recipients. The first one I made was this one: I decided to keep things as simple as possible, so stamped the image in black and heat embossed it with clear embossing powder, then stamped the butterfly and left it just in ink, so it looks quite different.  This was all done on a square cut out with a Nestabilities die, then layered on black.  The sentiment is computer generated.  I'll show you another one tomorrow.  I'm off to make my niece a birthday card, to cheer myself up! Thanks for dropping in today, your input is greatly appreciated. Jane xx

This Week's Christmas Card

Image
I am on track with the Christmas card making.  Here is the card I've made for a dear friend this week: Unllike yesterday's card, this one took hours to make.  I am having real problems getting stamps to stick on my acrylic block lately.  This one kept falling off before I could print it, then, despite my best efforts, part of the image was missing.  Grrr!  There's nothing so frustrating, is there?  Especially as I was using my beautiful smooth card to stamp onto.  I ended up wasting nearly a whole sheet.   I think you'll agree, it is a cute image though.  I first saw this last Christmas and really wanted it, but have actually only ordered it a couple of weeks ago. I tried to follow a sketch here, but it's not similar enough, so I'll have to pass on that one for this week.  I meant to put snow round the bottom, but forgot all about it!  It's sealed in the envelope now, so it's too late. Recipe: Cardbase: white card stock ...

Time For Cake

Image
I am a big fan of all things involving cake, so card making is no exception.  I decided it was time to pull out one of my favourite stamps for the card I made yesterday: Apologies for the photo quality as I'd put this card in a bag before realising I hadn't photographed it.  I can't take it out again without ruining the label on the back, so I had to take a picture in situ.  I had a bit of a saga with this card, as the paper I really wanted to use is by Papertrey Ink.  The whole paper pack only cost $8.  That would have been fine, but the delivery charge was $37!  That's a bit of a no-no, isn't it?  Even for me!  I really don't understand why shipping is so expensive, or why they don't get a distributor in the UK, as their papers and stamps would be very popular here.  Hey-ho!  So I started searching for another paper, and I'm delighted to say I found this paper from October Afternoon.  They never let me down, do they?...

Cheeky Monkey

Image
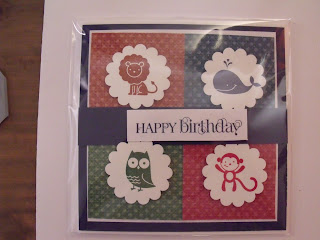
Well we are back to cold, windy weather, it seems.  Never mind, more opportunity to sit at my desk and make something.  Although, the card I'm going to show you today wasn't made at home, it was made at craft class last week.  Take a look: This stamp set is called Fox and Friends and it's in the new Stampin Up catalogue.  We cut four squares of designer paper (I can't remember the exact colours, except I think the lion is Cajun Craze and the whale is Night of Navy) and embossed them with the Square Lattice embossing folder (which I am going to have to buy!) and stamped the images onto Whisper White card and cut out with a scallop circle, as you can see.  It was a wonderful opportunity to use stamps I wouldn't normally use.  I am so enjoying going to this craft class, I am excited all day Wednesday, waiting for 6.30 to come.  We are doing a mix of Christmas cards and other cards.  We made a cute little box this week, which I'll try to show you s...

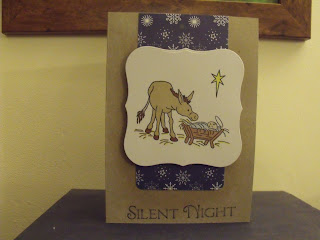
Silent Night

Image
Hello folks!  It feels truly bizzare to be making Christmas cards in this last bit of heat, but needs must.  Here is a card I've been working on for some friends at church: This little image (from Little Claire Designs) is going to be perfect for all my church cards this year.  I'm challenging myself to see how many different ways I can use it.  I do love an opportunity to get the embossing gun out and I was curious to see what this would look like without being coloured in.  I'm very pleased with the result.  Working from the base upwards, I've used kraft card, which you can't see until you open it, then a sheet of dark blue from a set which has something to do with Forever Friends, but I can't remember the name of it.  Next I've taken some white card stock and stamped on it with the music stamp from LOTV in green ink.  Then I've torn the sheet with the holly on at an angle in two corners and stuck that on, and finished off with the stampe...

Thankyou Card

Image
A couple of weeks' ago we went to some friends' pearl wedding anniversary celebrations.  Afterwards I realised it was the perfect opportunity to make a nice thankyou card.  This is what I made: Having made the cards for church recently, I've realised I love the A6 size of card (half an A5 for those of you who aren't sure).  It's quite small, but gives lovely proportions to whatever I make.  I'm also loving 5x7 cards as I think A5 is too big.  So everything's being scaled down lately! For this card I distressed the whole surface, then stamped with my letter stamp in Marina Mist.  I made a tag and distressed it, then went around the edges with a lovely chocolate brown ink.  The image is a stickeroo from Penny Black, and so is the butterfly.  It's so thin and beautiful it feels like it's stamped, it's fabulous.  These sheets of stickers are so beautiful and such good value, I'll definitely be buying some more.  I've put a bit of gard...

Welcome Baby

Image
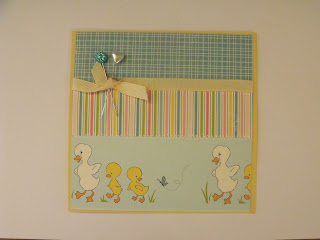
Hello everyone, I hope you're having a good start to your week.  It's glorious sunshine here, so I'm going to make the most of it. I have been busy crafting though.  This is what I made yesterday: I got the idea from Kimber McGray's book, '175 Fresh Card Ideas'.  I love every card in there!  The card she made was much smaller than this, though.  This is my first go with pins, which you can see stuck in the ribbon at the top.  The ducks on here are so cute. Recipe: Card Stock: So Saffron from SU Papers: October Afternoon - Ducks In A Row Pins: Wild Orchid Crafts My local craft shop is closing down, which I think is terrible, but they've got 30% off at the moment.  What is a girl to do?  Obviously I had to have a bit of a spree, and bought the ribbon for this card, amongst other things.  I've also just had a delivery of Stampin Up! goodies, but I think that will be it now until after Christmas.  Time to make the most of what I've got, ...

Let It Snow!

Image
I've been busy, peeps.  (I'm sure you have, too!)  I am keeping on with the Christmas cards, here's the latest: I've often seen cards like this and have really wanted to have a go.  Then, earlier in the week I found a template on a fabulous blog here .  Thanks so much, Connie Babbert.  Don't be alarmed if you make it and think it's really small, as it's only 4 1/2 inches across the bottom.  Connie's card looks big in her photo.  You'll need to look at her photo to work out which are valley and which are mountain folds.  I played about with it on a piece of scrap paper first, just to make sure I'd got it right.  It's a lot easier than you think.  The permutations are endless.  You can use a tall, slim stamp or just use the rectangular section to put a topper in any shape you like, as I've done here with the snowman on an oval base.  You could put a narrow sentiment all the way along the bottom, you could put a tag in the...

Feeling Krafty

Image
Continuing my love affair with kraft card, this is what I made yesterday: I love the clean, simple look of this kind of card. I love red with kraft card. Hope you like it! Recipe: stamps: freebie from Pink Petticoat in a magazine ink: Memento black Papers: October Afternoon Thrift Shop (again!) Embellies: 3 gems from Wild Orchid Crafts P.S. After reading Linda's comment below, I have decided to pluck up the courage to enter this card at the Less Is More Challenge .  It is my all-time favourite challenge.  I follow it faithfully, but have never had the nerve to enter it, but as their aim is to get to 1000 entries this time I think I'll put mine in.  Obviously most of their cards are white, but I've had a look and a few of them are coloured this time, so I may as well have a go, don't you think? Thanks for dropping by today.  Jane

Birdy Says...

Image
Good morning everyone, I hope you had a good weekend.  Ours was hectic as usual.  I had a sale of my cards at church yesterday and I'm thrilled to say I made £30 to go towards the work of our scheme for helping the homeless, called 'MAD' which stands for 'Make A Difference.'  I am thrilled to have been able to make a contribution, and even picked up a couple of commissions, so it was very exciting.  I got lots of lovely compliments on my cards, too.  So a good day, all in all. Onto my card for today: Autumn is my favourite season, so if I can get away with using autumn colours in a card, I will!  This is my first go with my new bird die from Marianne Creatables.  I've just backed it onto a white oval and used orange bazzil card and a sheet of paper from the orange Papermania set. Here's a close-up of the sentiment: I've used my new Four Frames die and stamp from Stampin Up! but I've used an orange Promarker to stamp it out, as proof to everyone i...