Posts

Showing posts from June, 2011

Some Bunny Loves You
Image
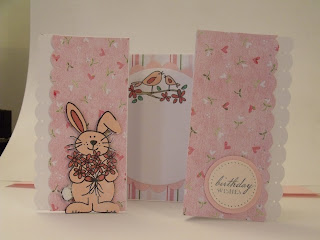
I've no idea if there is a special name for this type of fold for a card, but I really had fun making it.  It's two card blanks stuck together, with the front flaps of both folded backwards.  As you can see, I've used an EK Success border punch along both outside edges.  The rabbit stamp is from Little Claire's, which I coloured in pastel pink and antique pink Promarkers.  I've put some white fluffy stuff on her tail. I hope you can see the inside, which has stripy Nitwits paper on it, and a scalloped circle to write the message in, but my favourite part is the little bird stamp at the top.  I've used a little Craftwork Cards sentiment on the right hand side. I made a similar one here: This is with Nitwits paper again, and the little mummy duck from Little Claire's.  This was the first day I got my new sentiments from LOTV and couldn't wait to use them. Here is the inside: I've used toning paper from the same range, and done a yellow scalloped c...

Spoiled For Choice

Image
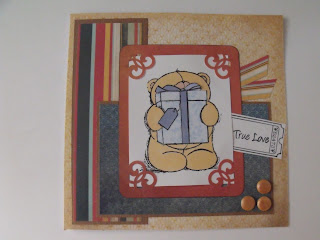
I have decided to enter this card in two challenges, the Penny Black Saturday Challenge Week 157 and Sketch Saturday  Week 161.  I decided to use Penny Black as my starting point.  The image you can see is a Penny Black stickeroo and it's absolutely beautiful (and it's taken me months to track them down!)  The 'problem' came with the paper, in that I've used The Linen Closet from DCWV.  The papers are so lovely and work so well together, that I must have spent an hour laying the stickeroo on different papers and laying papers alongside, to find a combination I really liked, but I got there in the end, and you can see the result above.  The narrow vertical strip has been stamped with the Penny Black letter stamp, then I've added the three little roses  from Wild Orchid Crafts, but I had a lot of options of what to put there to comply with the sketch (buttons? brads?)  So many decisions, so little time! Penny Black want us...

Happy Birthday Darling!

Image
I've decided to use the fab sketch over at Sunday Sketch and Stamp  to make my husband's birthday card.  This is only the second time I've made his birthday card, and I find it quite hard work as I want to make something he will really like. And so, here we are: I often end up using a Forever Friends bear as I think they're so sweet.  I colour them with Blush and Pale Yellow Promarkers.  I'm not saying that's the only way to do it, but I like the end result each time I do it. I stamped the image again on patterened blue paper and cut the gift box out of it, then stamped it again on plain card, cut out the ribbon and tag and coloured them with a blue Promarker, then stuck them on. I have finally got around to using these truly awesome Kaisercraft Seaside collection papers.  In fact they're so awesome I've spent many hours just gazing at them and wondering what on earth I could do with them to do them justice  (and, I confess, stroking them, but ...

Rainy Days

Image
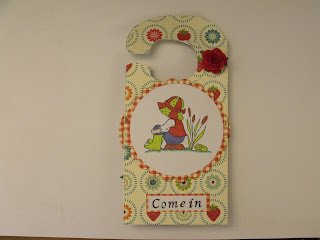
Over at Little Claire's the other day, they were asking what we were up to while the weather was so bad, and the funny thing was, I was making this: (I wanted to show you yesterday, but Blogger was playing up and wouldn't let me upload any photos). I decided to have a go at a door hanger, as my granddaughter had one, but her cousins got hold of it and tore it up.  She was quite upset, so I thought I'd have a practise run, then make one for her.  So I got out some papers and the Promarkers, and away we went.  I found a template on the internet, printed it off and used it to cut round these lovely October Afternoon papers.  They were a 12x12 paper that I bought for another project but had loads left over.  I've made it for our bathroom door, as we don't have a lock on it!  Here's the other side: Both images are from Little Claire's Designs and they're so sweet.  I decided it was the perfect opportunity to use up some of my flowers from Wild Orchid Craft...

All About Scale

Image
I'm learning so much as I go along. I've learned that a big card really needs a big stamped image, and a small card  needs a small image (and that if you swamp the card with lots of patterened paper the image can fade into the background).  So as I am trying to use up the last of my 12x12cm cards, I decided it was the perfect opportunity to use some of my smaller images. Here's the first one: I knew I wanted to use some pink papers, which I don't have nearly enough of!  It's a bit difficult to see but I've used glitter on the pink band around the cake and the pink base of the bear's foot.  The little pink and white buttons set it off a treat.  They are really one of the most useful things I've ever bought for crafting. Inspired by the pink version, I decided to make a blue one, have a look: These blue papers are so delicate, perfect for a card like this.  The ribbon actually matched the design on the blue circle.  I've added blue dotty button...

In The Moonlight

Image
Some of you will know that I get to sell some of my cards.  They are at a set price, and as I like to give value for money to my customers, I make them all 6"x6" (more or less) and they have quite a lot on them.  The trouble is, I have lots of smaller card blanks that I need to use up.  Some of them are cream and they're only 12.5cm square, and I don't feel I can charge a lot for them as they're fairly small.  So I've decided to use them for the church sale, then I can charge less for them. And so, having experimented with my inks the other day, I came up with this.  I don't have many inks (No Tim Holtz yet - sob!) so had to play about quite a bit, and be a lot firmer than I'd expected, in order to achieve this effect.  I cut a circle of card out and held it in the middle while I sponged the lilac all over the rest of the card.  Then I removed the circle and stamped the owl image from Little Claire's Designs in the space.  I used a...

A Touch Of Nostalgia

Image
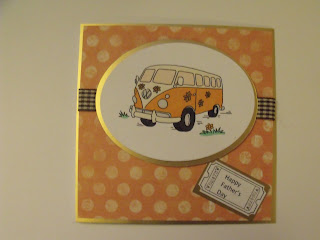
I made this card late last week, and when we went shopping I saw a man in the supermarket with this very thing on his T Shirt, so I felt as if I may have been barking up the right tree for once! I've made this as a Father's Day card for a friend to give to her dad.  I gave her three to choose from and this is the one she picked.   The VW camper van is from Little Claire's Designs, and as their Challenge No. 9  is to make a card for a man, I thought I'd enter this one.  It's a digi image, wonderfully clear and a pleasure to colour in. The papers are from MME, which I've had for ages.  The ribbon is from my ever growing collection (a girl can never have too much ribbon in my opinion!) I printed out the Happy Father's Day sentiment on my computer, then decided to stamp over it with my blank ticket sentiment from Bunny Zoe's Crafts.  It's rubber, so of course I can't see through it, so I decided it didn't matter if I missed, I'd ...

Molly and George Again!

Image
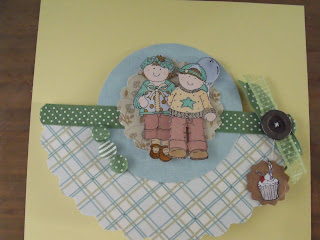
I hope you can see that this card is a scalloped semicircle.  It has a smaller circle in a different paper, then an even smaller circle.  All the papers are from The Linen Closet and they work really well together.  I am desperate for more plaid papers as I'd use them all the time if I could.  I found the green dotty ribbon and matching buttons in my stash, but the metal button on the right was a find that I couldn't resist using.  I sewed the thread through the button, left a long trail from it and stuck it to the little circle with the cupcake on it.  The balloon and the children's shoes have got Glossy Accents on (what fabulous stuff that is!) Here's a close up of the children: They are so beautifully detailed that no matter how you colour them you just can't go wrong.  I love using my Promarkers on them. I am away to tidy my desk this morning.  I know you often see lots of blogs with 'What's on your desk Wednesday?' and they have loads of s...

Happy Days!

No card today, as I have just got home from a mammoth riding session, but just to say I discovered last night that my card for the 'shape card' challenge over at Little Claire's Designs  made its way into the top three, which is why I'm now proudly displaying their Top 3 badge on my sidebar.  I am thrilled to bits.  Onwards and upwards then!

Move Over Jimmy Choo!

Image
I have a little set of blank shoe cards, which I feel are too small to use as a card on their own, so I used one as a template to make this card.  The papers are from MME and I've been dying to find a way to use these two papers together, the paper for the shoe and the spotty paper for the heel.  The card blank was actually an A5, and rather lovely it is too, but I cut it down for the scale of this card to a 6x6.  It all started as an experiment with my new printer to see which way up it prints on my paper, hence the sentiment which says, 'you can never have too many shoes.'  I decided if that worked I'd carry on and if it didn't I'd have to cover it up and make something else, but as you can see, it did work, and I'm very pleased with the result.  I just popped on a few roses from Wild Orchid Crafts, and left it at that. So Jimmy Choo, you are not the only person that can do shoes, okay?! Mrs O.

Iris

Image
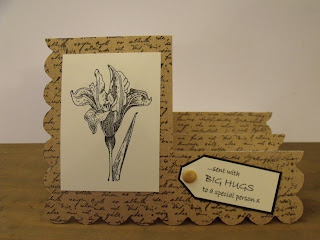
This is another of the Penny Black stamps I was telling you about.  At first I printed it onto white card and coloured it purple, but I had a moment of hesitation before colouring it in.  I knew my conscience was telling me it looked beautiful without being coloured, so that's what I did.  I printed it again on cream card and left it.  I covered one of the scalloped cards in the brown paper from The Linen Closet and stamped all over it with the Letter stamp and then stuck the main image down.  It was only after I'd made the tag that I realised I should have backed the main image with black card to match, or maybe put some black photo corners on it, but there we are, you live and learn, don't you?  I think it's obvious I'm in love with the letter background stamp! Well I'm off to make some cards for a charity church sale, as it's rather windy here. Thanks for stopping by today, your comments are really appreciated. Mrs O.

Flowers!

Image
Having said yesterday that I'm not keen on fairies, the other thing I would say I'm not keen on is flowers, but I want to be a bit specific here.  I don't like the normal, shop-bought (and therefore flat) cards that have a rose on and are very grannyish, do you know the sort of thing I mean?  The sort of card you can buy for 50p in Superdrug. But back last year I saw some truly fabulous Penny Black stamps that totally changed my mind.  As soon as I saw them I thought, 'this is the sort of card I want to make.'  I don't know why (financial constraints, probably) but it's taken me this long to buy them.  I also wanted the Linen Closet papers to go with them, and when you see them, I hope you'll see why. The main stamp is called Letters and Flowers, and it's truly beautiful.  I had a go with Promarkers but felt they were too powerful for such a delicate stamp, so I coloured it with blue and green watercolour pencils.  It was lovely to get my penci...

A Card For Two Challenges

Image
I've managed to combine two challenges to make this card, which was very useful for me. It took absolute ages in the planning stage.  I played about with papers and colours until I was happy with the colour scheme.  I stamped the fairy once and wasn't happy with the way I coloured it, stamped it again and coloured it differently and was happier, but not totally satisfied.  Then I stamped it on cream card instead of white and suddenly it was exactly what I was looking for. It's amazing how such a little change can make such a huge difference to the overall effect. The papers are from my Country Diary collection.  I didn't have a clue how to do the two little clasps on the right hand side, thinking, 'Poor me, I don't have a special cutter!' It came to me in the middle of the night, to use my script stamp on cream card and cut it out like I have done.  The sentiment was the only quick bit! And so this challenge is for the St. Luke's Charity Cards Challe...