Posts

Showing posts from December, 2011

Just For Fun - A Look Back At 2011

Image
I've had such a wonderful year of card making and I've learned so much, I thought I'd share some of my thoughts with you as we look forward to 2012. Let's start with gadgets.  I have two contenders for this award.  The runner-up is this little beauty: I'm really sorry, because I threw the packaging away and can't even think who makes these, but what a brilliant item.  I always struggled with glitter and embossing powder, trying to save it and pour it back into the container but this item is fabulous for getting everything back into the pot. But the winner in this catagory is, without a doubt: my wonderful, clever, Stamp-a-ma-jig.  Who would have thought a simple piece of plastic could change your life?!  If you want to know why, let me explain. It's very simple.  It can help you turn this: into this: Thankyou, Stampin Up! I love it. Okay, second award.  I am presenting this to the pad of paper I have used the most this year.  The ru...

Trendy Trees

Image
Hello dear Blog friends!  I hope you've had a lovely Christmas.  Was Santa good to you?  Did you get crafting stuff?  I am thrilled because I got a set of all the Stampin Up! cardstock, the stamp set called Trendy Trees, and the Funky Forest Wheel.  I spent most of Boxing Day playing with everything, and sorting the cardstock into separate packs.  I found it a bit tricky with the Neutrals set, as some of them are very similar, but I think I've got it right. I made this card as a thankyou to some friends who had a party just before Christmas.  I know I could have been quite adventurous with it, but decided to start off as simply as possible. Even hubby was impressed with the quality of the stamping.  This is the reason I bought my Stamp-a-ma-jig.  I can't tell you how satisfying it is to stamp the branches in green then stamp the trunk in brown, exactly where it needs to be.  You see things like this on other blogs and can't ...

Little Donkey

Image
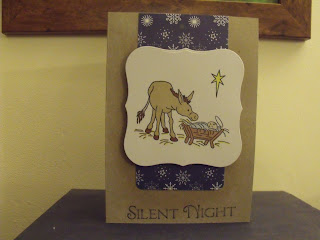
Hi there!  I've decided to make this my last  post before Christmas, as the chores are mounting up and, frankly, if I don't do them, no one else will!  This is the card I sent to my dear friend Margaret .  I just think the sweet simplicity of it sums up the true meaning of Christmas. (And I hope she liked it!) I'd like to take this opportunity to wish you all the joy of the season, and to thank you so much for all the kind and uplifting comments that you've left me this year - they've meant a great deal.  The friendship of the crafting community in blogland has become very special to me. Watch this space, though, as I will be back some time between Christmas and the New Year, to do a little awards ceremony of my very own.  See you then. Best wishes, everyone! Jane xx

Tree Trimmings

Image
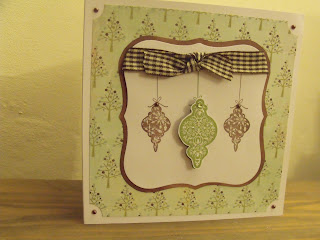
Hello blog friends!  I realise I haven't posted for a few days, but it's been so hectic here.  I can't complain as I've been out for two Christmas lunches and two Christmas parties!  I am sooooo tired! I just wanted to show you the card I made for my craft group friends: The stamps are a brilliant set from Stampin Up! called Tree Trimmings.  You can't see it very well in the photo, but I've stamped each bauble and heat embossed them, just with clear embossing powder to add a bit of shine, but then I've added glitter with my Quickie Glue Pen, so the ornaments sparkle beautifully.  I've added some tiny gems to the top of each bauble (from Wild Orchid Crafts.  Note to self - order some more, they're fabulous!) The background paper is MME Snowed In, and the colours match my inks perfectly.  I was so pleased as it was complete chance.  I stamped the baubles, then started hunting round for paper so was delighted to see how well these went together. I...

Desky Maiden

Image
Hello!  No card to show you today, but I am thrilled to be showing you my new desk.  First of all, here is the old one: This is my beautiful bureau.  We've had a lot of fun together, and her storage capacity is vast.  But when you lift the flap down, the actual work space is quite small.  I am faithful to my furniture, and this desk isn't going anywhere, I'm just going to use her for storage. But this is my new desk: The workspace is much bigger and goes much further back.  I love the drawers on the right.  At the moment they contain all my punches, but this may change.  There's loads of room for my Bigshot on the top. Here are all my shelves, with my Tim Holtz inks, and all the tools I regularly use.  The good thing about the old desk was that I could have everything I needed around me all the time, and this desk had to be the same.  I can't stand having to  jump up and down every five minutes to collect things.  Can...

Frosty The Snowman

Image
When it comes to cardmaking, I'm not really a glitter girl at heart.  I have a lot of glitter card but I haven't ever used it.  Then all of a sudden, this happened! All of last year I wanted a snowflake die, and now I've finally got one, and I'm having a lot of fun with it.  I've also used my new holly leaf punch on here and my Nellie Snellen leaf punch, which cuts out the really delicate leaves you see here.  I stamped the sentiment in the middle in Marina Mist ink and then added the snowman that I'd actually made for a different card but ended up not using it.  I popped him on here and decided he looked right at home. Some of the snowflakes are just plain card, but on others I've added either embossing powder or glamour dust  and it's that contrast that seems to make the card quite pretty.  It's appropriate as we've had snow here this week.  Well I am off to completely rearrange my sitting room, as we have just co...

Rockin' Robin

Image
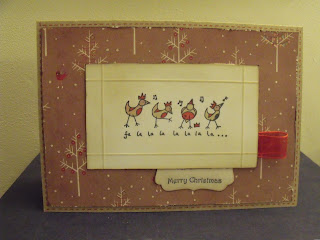
For some reason that I still can't quite understand, this card took me nearly all day to make! This paper is absolutely beautiful.  It's part of the Polar Expressions range by Imaginisce, called Frosted Forest.  It's got very subtle glitter on it, that feels fabulous when you touch it.  But for some reason, I got as far as putting it on the kraft card then my mind went a complete blank and I just couldn't decide what to put with it.  In the end this little robin stamp presented itself to me and it turned out to be the perfect thing.  I've scored the white card to make a little frame, then distressed it and added the stamped image, which matched the card very well once I'd coloured it in.  My horse is called Polar Express, so finding a paper range called Polar Expressions was right up my street.  I have got some left so I dare say I'll manage to think of something else to do with it.  Well, it's just a flying visit today I'm afraid, as I ha...

One Of A Kind

Image
Hello all, I hope it's not too wet and windy where you are.  I'm not keen if I have to be outside, but don't mind snuggling up in front of the fire with a good book, or some cross stitch and a cat on my lap.  I am feeling flushed with success as I'm pretty sure we've done all the Christmas shopping today, so now I have the mammoth task of wrapping everything and making tags! Here's a card I'd like to share with you today: This card is unique because the white and blue dotty paper is my last ever piece of the Craftwork Cards vintage range.  It was perfect for this card.  I've cut the scalloped circle and trapped a die cut snowflake inside vellum and added it to the vertical strip.  The snowflake top left is Perfect Plum and the scalloped circle is Rose Red, two beautiful Stampin Up! colours.  The sentiment is from Craftwork Cards, too.  I was thrilled to be able to die cut a little circle, punch two small holes in it and make my own button.  It...

Take Flight

Image
Hello all, I hope you're well and getting plenty of time to indulge your passion for crafting!  I would like to say a warm welcome to my new followers.  I am thrilled and delighted that you have decided to come along on my journey of discovery into paper crafting with me. Here is my offering for today: I have used a 5x7" card blank.  I've cut sections of glossy card, stamped them with the bird from Special Blessings, and a swirl stamp in Versamark ink and heat embossed them in white embossing powder. Then I've got the brayer out and inked the sections up with Tim Holtz Shabby Shutters ink (but I think it would look nice in Baja Breeze or Marina Mist, too).   I've backed them onto bazzil card.  I'm sorry, I don't know the colour, but it's almost gold.  I added the die cut flower and the buttons, which went really well.  The sentiment, 'Take Flight' is computer generated.  I'm very pleased with the result, and hope my friend likes i...